Color Burst and Liquid Metals Fun
Sometimes the order of the day is playing and making a mess. I've had several sets of Ken Oliver's Color Burst powders and a set of Liquid Metals hanging around in my studio for a while. I've used the powders a little bit, but never the Liquid Metals. Time to see what they will create!
When using pigment powders, first apply Gloves in a Bottle to protect your skin and I highly recommend working over the Best Ever Craft Mat because it has quite a sticky surface that grabs excess powder. Placing damp towels around the mat helps attract anything the mat misses. Whatever you do, don't have a fan blowing!
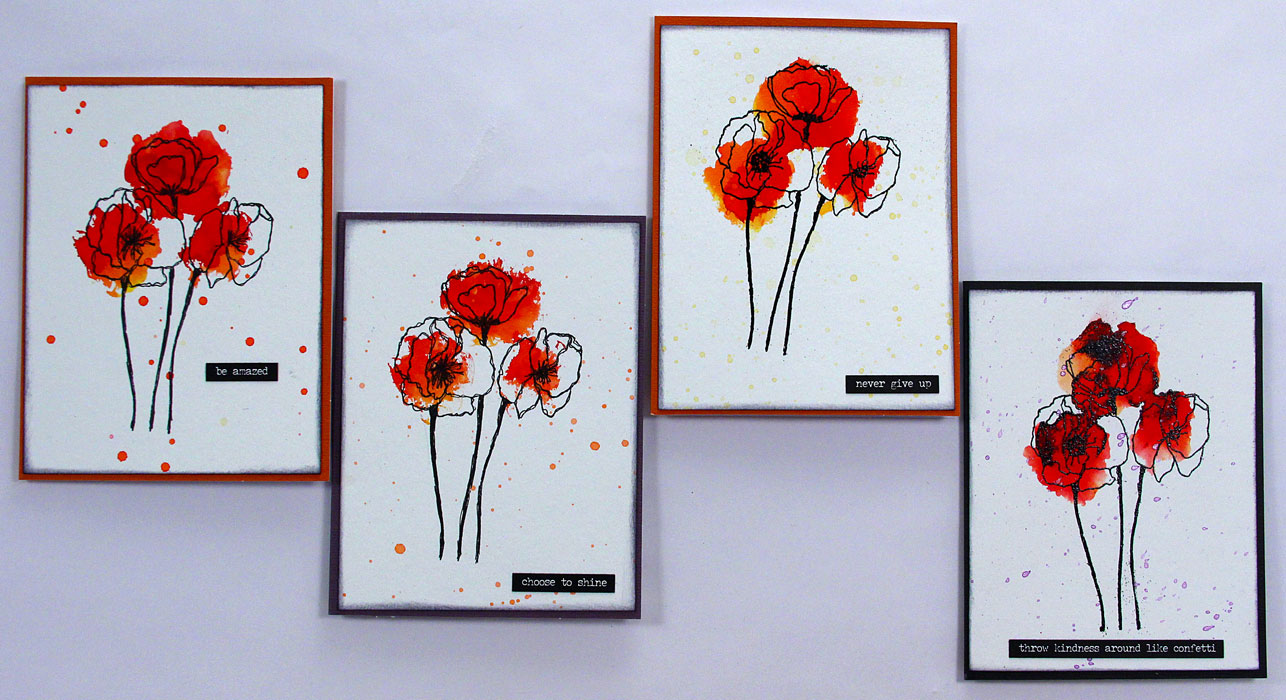
The Poppy Trio stamp set (see cards below) is perfect for Color Burst. Some of the stems are stamped with Black Archival Ink and others are heat embossed with Versamark Ink and Black Detail Embossing Powder. (In no way do I claim to be a stamper. I just play and have fun! If you want more information about stamping, check out Lindsay Weirich's Stamp School videos.)
I played with some other rubber stamps in my studio, too. You can see how I used them for cards in the center section below. Each of these samples is created on watercolor paper and then attached with Scor Tape to pre-folded card bases. I used phrases from the Tim Holtz Small Talk sticker pad because I can't seem to create cards without words. 😉


I wanted to see how Color Burst and Liquid Metals reacted on fabric and you can see those examples in the photos below. The book cover in the back was created with white Sticky Back Canvas. To activate the powders, I tried Spectra Fix because I wanted to see how it worked. I attached it to the front of a composition notebook with Aleene's Tacky Glue (I never fully trust the adhesive on the canvas without extra glue.) The small notebook is covered with a piece of Duck Cloth or Duck Canvas. To activate the pigment, I used Liquitex Professional Satin Varnish and a small amount of water that I sprayed over the surface. Once the fabric was completely dry, I glued it to the notebook with Tacky Glue, too. (NOTE: I soaked scraps of each fabric in water to see if the pigment would release. The Sticky Back Canvas lost slightly more of the color than the Duck Cloth. Both seem to be fairly stable.)
The samples on the right below are watercolor paper. I sprinkled one piece of paper with quite a few colors of Color Burst, added some Liquid Metals and a lot of water. While it was very wet, I pressed the second sheet of watercolor paper over, creating a mirror image. After it was pretty dry, I began drawing a Mandala with a Fineline Bottle filled with black Createx Airbrush paint that has a small amount of water to thin it slightly. Once the paper was fully dried, I doodled all over the sheet with various paint pens.

Back – Sticky Back Canvas, Front – Duck Cloth

Mirror Image Prints on Watercolor Paper
Left – dried colors
Right – Mandala drawn with Fineline Bottle with paint and the rest with paint pens
If you've experimented with Color Burst or Liquid Metals, I would love to hear about your results. Please feel free to leave a comment below.
I hope you can join me each Drama-Free Friday at 2pm Eastern. I love chatting with the viewers as we get creative together!
Until next time ~
Remember to Get Creative today! It's Easy!
Barb
P.S. Please leave a comment below.

About the Author
Barb Owen
Barb is the founder of How to Get Creative, author of "Normal Doesn't Live Here Anymore", a specialist at playing in the art studio and has an unhealthy addiction to smiles. ;-)

Comments: