From Kid's Drawing to 3-D Cutie

Last week's blog post was all about using a 3-D object as inspiration to create a copper pendant. I thought it would be fun to use Kristi’s adorable drawing as my inspiration to create something in clay. I wondered what this little character might look like in 3-D, so out came the Paperclay and I began playing.
Get Ready
I love the feel of Paperclay, so after finding a fresh package, my stylus set, a craft knife, a clay blade and a ceramic tile, I was ready to begin. I quickly discovered that I needed some water and a small brush for smoothing the surface. Because I wanted the figure to look like child’s art, I wasn’t too obsessed about removing every itty bitty flaw in the surface.

Create the Body
First things first: Create the little body.
I shaped a square on the ceramic tile, and then somewhat pinched the top so that the base was wider than the top. I also created two little tunnel shapes beneath the bottom edge where her legs would go.

The Legs

Next: shape the legs
They are meant to look a bit like a rag doll, so no fancy feet! Once I was comfortable with the size and shape, I brushed the tops of the legs and bottom of the body with water and attached them together.
The water acts like glue for Paperclay and is usually enough to hold the parts together (this is a small figure – less than 2″ tall). Once the figure dries, I can always add a small amount of glue, if needed.
Adding Arms
Next: shape the arms
The arms are very similar in shape to the legs. Like a rag doll, there are no fiddly fingers.
Her arms are attached by dampening the body and smoothing in place. I continually used a dampened brush to somewhat smooth out the surface.

Add the Head and Tummy
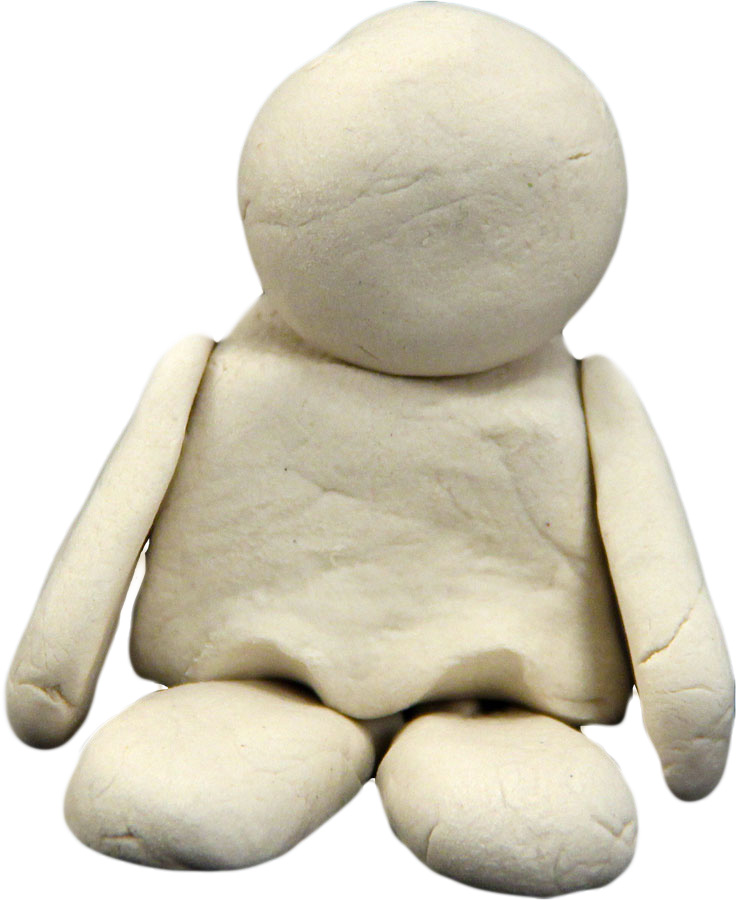
Head: Her head is a flattened ball to suggest a ragdoll shape.
Tummy: To honor Kristi’s drawing, I rolled out a thin layer of paperclay and used the blade to cut two trapezoid shapes that I attached to the tummy in a rather wonky way.
Each time I added anything, I dampened the surface.

Hair and Face

Face: With a stylus, I created a small hollowed area for each eye and the nose. After rolling tiny balls of Paperclay, I poked them into the hollowed spots, but let them stick out just a little. Her mouth is a depression created with a stylus and then brushed with water to soften the edges.
Hair: Her hair is a thin layer of clay that I textured with a craft knife to create the look of yarn.
I softened the surface, removing some of the texture in the body, with the damp brush. I also brushed a bit of additional water around each place where two things joined together.
With the help of a clay blade, I carefully removed the completed figure from the tile so that I could transfer her to a clay-dedicated cooling rack to dry.
Time to Wait
Next, the hardest part for me. Waiting!!! Paperclay needs to be completely dry before painting, so rather impatiently, I waited. And waited. And waited some more. . . . .
Finally, she was dry and ready to come to life! I added color with acrylic craft paint. Fortunately, craft paint dries quickly because I was so curious to see what she would finally look like!
I added a coat of Americana DuraClear Matte Varnish, but she looked a little too clean. 😉

Antiquing

I really like antiquing, so once the varnish was totally dry, I brushed a very thin coat of Burnt Sienna craft paint over the surface. (I also tried Burnt Umber which created a muddier appearance.)
I brushed on the paint and immediately dabbed off all excess. You can always add more to deepen the color, but it's difficult to deal with if it dries.
I like the way it gives the figure an aged look – like she was created years ago.
That's how I used a Kid Art drawing as inspiration for a 3-D figure. Too much fun!!
Please tweet photos of your kid-inspired art @BarbOwenDesigns. I’d love to see and share them!
See you Friday at 2 pm eastern.
Remember to get creative today. It’s easy!!
Barb
