Lou Ann Gleason from Gelli Arts® kindly sent me their new 9″ x 12″ Gelli Printing Plate, so what better way to learn about it than by cracking it open during a LIVE Drama-free Friday?! I have to say that even though I've purchased quite a few different sizes of Gelli Plates, I'm absolutely thrilled with this NEW size! Trying to figure out which of my plates I like best is like trying to pick a favorite child 😉 but I have to say that the 9″ x 12″ could be my super, very favorite one. I've always enjoyed printing on card stock and copy paper with my 8″ x 10″ Gelli Plate, even though the prints leave a white border around the image. After several hours of using the 9″ x 12″ plate, which allows me to print all the way to the edges of the paper, I realize how nice it is to have that capability!
In the video you'll see me printing with Dylusions Acrylic Paints which I textured with various tools from my studio along with stencils and masks, too. Check out Joggles.com for a great selection of both. I also love my stencil and mask collection from The Crafter's Workshop. You can never have too many stencils!
Below you can see several of the prints created during the LIVE stream.


After breaking in my new 9″ x 12″ Gelli Plate, and all the prints were bone dry, I used various paint pens to further embellish each page. I totally enjoy finding patterns within the prints to emphasize. It's a fun activity while listening to a boring television show. 🙂
When you watch the video, you'll notice that I used a large piece of scrap paper to pick up paint around the edges of my prints. I cut up that scrap paper to create various widths of paper tapes to which I added Scor Tape. When I'm ready to use the tape, I simple remove the paper backing and stick them in place. I loved the way this junk paper turned into something useful.
Be sure to click on the images to see all the details.

Tapes created from junk paper.
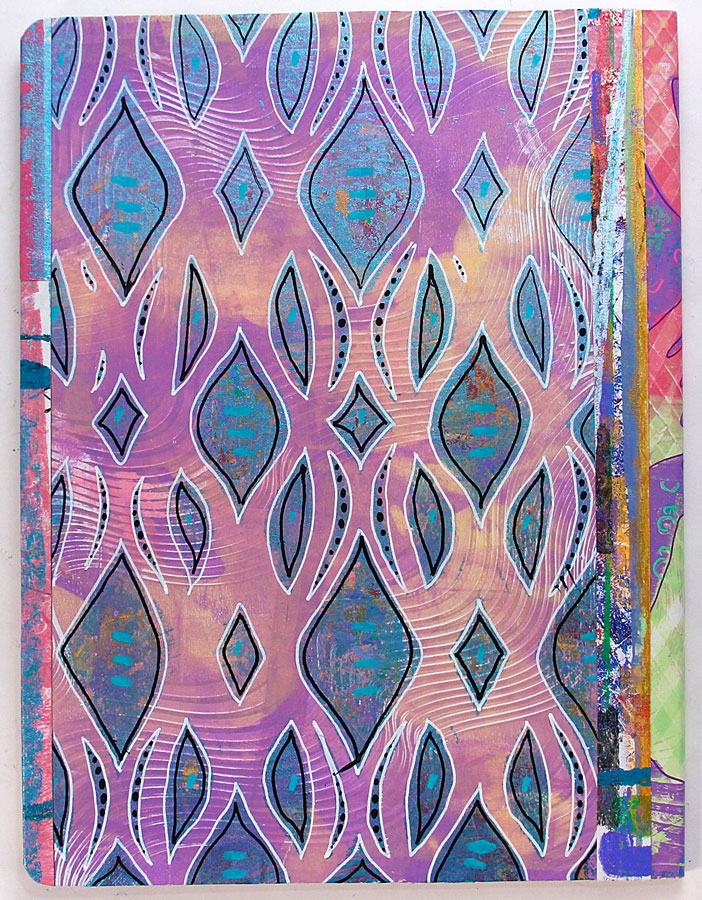
The following images have been embellished with paint pens.


I love creating my own collection of papers to use. I chose 2 of my favorite finished papers that I glued to the cover of my current journal. I couldn't resist using some of the paper tapes to add some added interest to the covers, too. Because the papers were thin, I used Elmer's Xtreme Glue Stick to attach them to the journal. By adding glue stick to the cover as well as to the paper, I was able to apply the paper without wrinkles and it looks great.
Thank you, Lou Ann and the Gelli Arts® team for sending this beautiful 9″ x 12″ Gelli Plate. I can truthfully say that I love this size!

Front Cover (note the right edge where you can see some of the tape)
Back Cover (you can see tape at the left edge and also near the spine)
Please join me May 4th for Drama-free Friday LIVE. You don't want to miss it because . . . drumroll . . . Lou Ann Gleason will be joining me LIVE for a Creative Chat! Mark your calendar . . . Set an alarm . . . Do whatever you need to do so you can join us LIVE!! 🙂
Until next time ~
Remember to Get Creative today! It's Easy!!
Barb
